Although nowadays we store pictures on our devices and upload them to the cloud, look at them on our phones, and share them through digital mediums like email and social media; sometimes, you may still want to print pictures on paper. For instance, if you want to make a decorative picture frame or want to share something memorable with someone.
Whatever the reason it might be, Windows 10 includes a tool built into File Explorer and the Photos app to make it easy to print pictures without the need for third-party tools or expensive software.
In this Windows 10 guide, we’ll walk you through two quick ways to print pictures without installing third-party software.
If you don’t have a printer configured on your device, you can use these steps before proceeding. If you’re dealing with an older printer, use these instructions to set it up.
- How to print picture with File Explorer
- How to print picture with Photos app
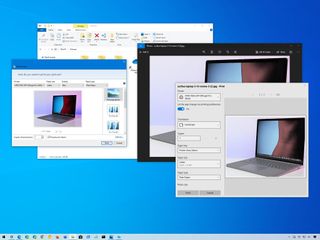
How to print a picture with File Explorer
To print an image using File Explorer on Windows 10, use these steps:
- Open File Explorer.
- Browse to the folder with the image you want to print.
- Right-click the image and select the Print option.

- Use the “Printer” menu and select the printer connected to the computer.
(Video) How to Print Photos in Different Sizes in Windows 10
- Use the “Paper size” menu and choose the size of the paper you’re using with the printer.Quick tip: If the option isn’t available, select the More option.
- Select the layout of print using the options on the left pane. (The layout options will be different depending on the paper size option.)
- Use the Quality menu to select how much ink and precision the printer will use for the print.
- Draft: Uses less ink, process the print quickly, but the quality won’t be right. Usually, you want to use this option for everyday quick prints.
- Normal: Uses more ink than Draft, the quality of the print is better. This option is better suited for content (text with images) printing.
- Best: Uses more ink, process the print slower offering the best quality possible. This option is recommended to print photos.
Printing and print preview – Microsoft Support
- Use the “Paper type” menu and select the type of paper you’ll be using with the printer. (These options may be different per printer manufacturer and model.)Quick tip: Usually, you can find this information printed on the box of the paper.
- (Optional) Clear the Fit picture to frame option to prevent parts of the image from getting cut off.
- (Optional) Use the Copies of each picture option to specify how many prints you want.
- Click the Print button.
Once you complete the steps, the print job will be sent to the printer you selected.
In the “Print Pictures” experience, there’s also an Options link that allows you to access some additional settings, including “Sharpen for printing” and “Only show options that are compatible with my printer.” Also, you can click adjust the “Color Management” settings (not recommended), and you can click the “Printer properties” option to change other printer settings specific to your model.
How to print a picture with Photos app
Windows 10 also comes with the Photos app, which allows you to edit and print pictures easily.
Print image without editing
To print an image (as-is) with Photos, use these steps:
- Open Start.
- Search for Photos and click the top result to open the app.
- Click on the picture you wish to print.
- Click the Print button from the top-right corner. (Or use the Ctrl + P keyboard shortcut.)
- Use the “Printer” menu to select the printer.
(Video) How to print multiple pictures on one page Windows 10 the easy way
- Use the “Orientation” menu to choose the mode on the image. For example, portrait or landscape.
- Use the “Paper size” menu to select the size of the paper.Quick tip: If you’re printing to regular paper size, you can leave the default option. If you want to print the image on a particular paper, you need to specify the size. Usually, you’ll find this information around the box of the paper.
- Use the “Paper type” menu and select the type of paper you’ll use with the printer.
- (Optional) Use the “Page Margins” menu and select the Normal option.
- Use the “Photo size” menu and select the size of the picture.
- (Optional) Use the “Fit” menu and select the Shrink to fit to prevent cutting off part of the picture in the printout, or select the Fill page option to fill the entire page with the image.
- Click the Print button.
After you complete the steps, the Photos app will send the print job to the printer.
Also, within the print settings, you can click the More options link to configure additional settings.
In the page, you can customize many settings already available on the main page, and some other options, including:
- Output quality: Includes the option to decide how much ink and precision to use on prints. Options include “Draft,” “Normal,” and “Hight quality.”
- Color mode: Allows you to print in color or black and white. Options available include, “Color,” “Grayscale,” and “Monochrome.”
- Borderless print: Removes the white borders around the picture, so it fills the entire canvas of the paper.
Edit and print a picture
If you want to print the best version of a picture, the Photos app includes many tools, such as crop, filters, and adjustments, to quickly and easily edit images before printing.
To edit and print a picture with Photos, use these steps:
- Open Start.
- Search for Photos and click the top result to open the app.
- Click on the picture you wish to print.
- Click the Edit & Create drop-down menu and select the Edit option.
- Click the Crop & rotate button from the top-center toolbar to access the options to select the area you want to crop.Quick note: You can use this guide to learn more about cropping images on Windows 10.
(Video) Print Photos from Windows 10, 11 | HP Printers | @HPSupport
- Click the Filters button from the top-center toolbar.
- Select one of the fifteen available filters from the right side.
- (Optional) Use the Filter intensity slider to adjust the brightness of the filter.
- (Optional) Click the Enhance your photo option to allow Photos to improve the look of the image automatically.
- Click the Adjustments button from the top-center toolbar.
- Use the Light slider to adjust the brightness of the picture.
- Click the Light right-arrow to adjust the brightness manually.
- Use the Color slider to make the image pop or remove colors to print a black and white photo.Quick note: Although you can adjust the image color, the Photos app includes the Grayscale option in the advanced printer settings to print the picture in black and white.
- Click the Color right-arrow to adjust the tint and warmth of the picture manually.
- (Optional) Use the Clarity slider to make the image sharper.
- (Optional) Use the Vignette slider to add shadows around the sides.
- Click the Red eye button and click the red-eye on the image to remove it.
- (Optional) Click the Spot fix button and click an imperfection to fix it.
- Click the Save as a copy button.
- Click the Print button from the top-right corner.
- Use the “Printer” menu to select the printer.
- Use the “Orientation” menu to select the mode on the image—for example, portrait or landscape.
- Use the “Paper size” menu to select the size of the paper.
- Use the “Paper type” menu and select the type of paper you’ll be using with the printer.
- (Optional) Use the “Page Margins” menu and select the Normal option.
- Use the “Photo size” menu and select the size of the picture.
- (Optional) Use the “Fit” menu and select the Shrink to fit to prevent cutting off part of the picture in the printout, or select the Fill page option to fill the entire page with the image.
- Click the Print button.
Once you complete the steps, the edited picture will print out to the printer you selected.
Get the best of Windows Central in in your inbox, every day!
(Video) How to Take a Screenshot on Windows 10
Mauro Huculak is technical writer for WindowsCentral.com. His primary focus is to write comprehensive how-tos to help users get the most out of Windows 10 and its many related technologies. He has an IT background with professional certifications from Microsoft, Cisco, and CompTIA, and he’s a recognized member of the Microsoft MVP community.
Topics
Windows 10 Help
(Video) How to Print a Picture in The Windows 10 Photos App
Print only a picture from a web page
To do this, right-click the image and select “Open image in a new tab” or “Open image.” Once the image is displayed by itself, press Ctrl + P on a PC or Command + P on an Apple computer to start the print process. You can try these steps now on the image below.
How do I print to JPG in Windows 10? ›
Open the document that you want in a corresponding viewer. Choose File>Print… and, in the print dialog that displays, select the ImagePrinter Pro as your printing device. Then, click the Properties button to the right and in the window that appears go to the Options tab. In the Format list, choose JPG image.
How do I print a picture on multiple pages Windows 10? ›
Along with other printing options like paper Size, Orientation, or Margins, you should also find a section called Scaling. To print your large image on multiple pages, have Paint scale your image to “Fit to” as many pages as you want.
What is the easiest way to print photos? ›
CVS Photo App: Simple and Convenient
We designed a free app that will let you select photos right from your camera roll and have them sent to CVS for fast printing. The best part is that you can pick up your photo prints in as little as one hour!
How do I convert a picture to a JPG? ›
Go to File > Save as and open the Save as type drop-down menu. You can then select JPEG and PNG, as well as TIFF, GIF, HEIC, and multiple bitmap formats. Save the file to your computer and it will convert.
How do I print full size photos? ›
Start by choosing “File” and then “Print,” and clicking the “Position and Size” settings. Usually, the default option is “Scale to Fit Media,” which prints to the page margins. Deselect it, then manually enter scale, height and width values that equal the full size of your paper. Click “Print” to print your image.
How do I print a large image on multiple pages in Windows? ›
Printer settings
Select the appropriate Size setting. Select Portrait (tall) or Landscape (wide) to change the orientation of your printout. Click the Page Layout tab and select Multi-Page, then select Poster Printing. Click the up or down arrow to select 2×1, 2×2, 3×3, or 4×4.
How do I select multiple photos to print on my computer? ›
Select the photos you want to print.
To select multiple photos, hold the Ctrl key as you click each file. You can also click and drag your mouse over the photos.
Can Walgreens print photos from my computer? ›
Welcome to Walgreens! Upload photos from your phone, tablet, desktop, Facebook, Google Photos and Instagram.
How do I print pictures from my computer at Walgreens? ›
Simply download our app from the Google Play or Appstore, upload the photos you would like printed and place an order. Walgreens will go ahead and print your order within the hour and you can have access to your beautiful photo prints in a snap.
Videos
1. How to Print a Picture from File Explorer in Windows 10 2. How to Print Multiple Pictures on One Page in Windows 10/11 3. How to Print Multiple Images On One Page Windows 10 4. Printing Photos with Windows Photo Viewer | HP Printers | HP 5. How to Print Multiple Pictures on One Page in Windows 10 | Definite Solutions 6. How to print several pictures on one piece of paper (Windows 11)
Author: Moshe Kshlerin
Last Updated: 04/08/2023
Views: 5787
Rating: 4.7 / 5 (77 voted)
Reviews: 84% of readers found this page helpful
Name: Moshe Kshlerin
Birthday: 1994-01-25
Address: Suite 609 315 Lupita Unions, Ronnieburgh, MI 62697
Phone: +2424755286529
Job: District Education Designer
Hobby: Yoga, Gunsmithing, Singing, 3D printing, Nordic skating, Soapmaking, Juggling
Introduction: My name is Moshe Kshlerin, I am a gleaming, attractive, outstanding, pleasant, delightful, outstanding, famous person who loves writing and wants to share my knowledge and understanding with you.
© 2023 Fimsol. All Rights Reserved.